How to Increase Quest 3’s Resolution and Graphics
The Meta Quest 3’s panels have a resolution of 2064 x 2208 per eye, however, games are only rendered at 1680 x 1760 resolution. This is like watching a 720p video on a 1080p monitor.
In order to increase the Meta Quest 3’s graphics and resolution, there are 3 things you can do:
- Manually increase the resolution using SideQuest app (free)
- Manually change the resolution using Quest Games Optimizer (paid)
- Connect the Quest 3 to a VR-capable PC and change the render resolution (requires PC + cable or router)

Beware, bumping up the resolution will result in faster battery drain and potential headset overheating. This is a tradeoff that must be made.
Method 1: Using SideQuest to Increase Texture Size
Using SideQuest, you can set your Quest 3’s resolution to max (3072), which makes a dramatic improvement in visual quality. In order to do that:
- Install SideQuest by following the instructions on their website.
- Go to device settings by clicking the wrench icon
- Change default texture size to max (3072)

You will notice a huge improvement over the resolution of games with this setting, however, some games will stutter. Games like Beat Saber will run fine, but more intensive games like Red Matter 2 will stutter, so you’ll need to experiment with the settings. You can lower the refresh rate if the game starts to stutter.
The alternative is:
Method 2: Using Quest Games Optimizer to Increase Quest 3 Resolution
Using Quest Games Optimizer, you can modify the resolution of Quest 3 games, allowing you to increase the resolution in exchange for battery life or refresh rate.
Quest Games Optimizer is a paid app that does the same thing as SideQuest, but the main difference is it allows you to save a profile for each game.
I highly recommend it for convenience reasons, but if you’re trying to save money, using SideQuest is fine – you’ll just have to spend more time manually tweaking the settings of each game.
Method 3: Connecting Your Quest 3 to PC to Increase Render Resolution
The last method involves connecting your Quest 3 to your PC via Air Link (requires a 5G router) or Quest Link (requires a long USB-C cable).
This method also requires a powerful, VR-Ready computer, but also allows you to play SteamVR games.
Once connected, you can change the supersampling or “render resolution” through the Oculus App on PC. You can also change this through SteamVR settings.
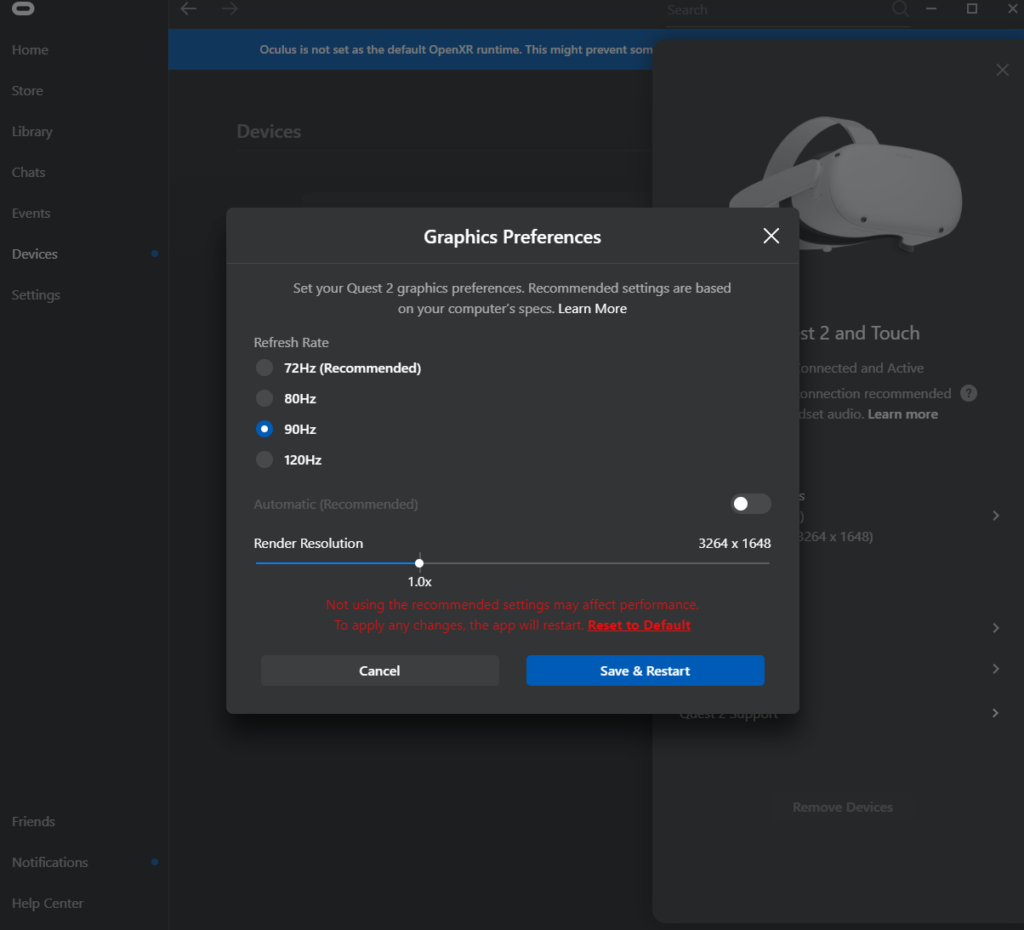
The advantage of this method is you won’t be relying on your headset’s GPU power anymore. You can turn up the resolution settings to as high as you want, depending on how much your computer can handle. The downside is you need a powerful graphics card on your computer to take advantage of this.
Related: Best computers for the Meta Quest 3
Important quotes from the article:
What Graphics Card do I Need for the Meta Quest 3?
The ideal graphics card for the Meta Quest 3 is one that can support AV1 hardware encoding, which are the 40-series graphics cards (RTX 4060 and above). In a nutshell, AV1 Codec will make games look better with almost no compression, however, not everyone can afford this so there are still other options to make VR look good without breaking the bank.
Best Render Resolution Settings:
- 130% render resolution is the “sweet spot” where the graphics start looking good
- 150% render resolution is ideal if your PC can handle it. Past this point is diminishing returns where you won’t see much gains for the amount of processing power required.
- 100% render resolution looks okay, but you’ll experience some artifacts in some games.
- Below 100% starts to look terrible.
Overall, these 3 methods to increase your Quest 3 resolution will make the visuals much sharper and clearer. It’s like upgrading to a Quest 3 Pro! Try it out and you’ll be surprised :)