How To Stream Your Meta Quest 2 & 3 To Discord
Streaming from your Quest 2 to Discord is relatively easy, as it can be done without third-party apps through the Quest 2’s casting system. Using this method, you’ll not only be able to stream to Discord, but can also stream to Twitch.
Step 1 – Connect Quest 2 to the same network as PC.
Your PC can be connected via an Ethernet cable to the modem or router while the Quest 3 is connected over the Wi-Fi, but they have to be connected to the same network.
Step 2 – Set up Oculus Casting
Oculus Casting is the default way of streaming content from the Quest 2 to a computer by using software that is already on the hardware. You will not be required to install any third-party apps to stream this way.
How to set up casting on Quest 2:
1. Open up an internet browser of your choice on your PC (Quest casting supports only Google Chrome and Microsoft Edge at the moment)
2. Head to Oculus.com/casting in your browser, click the “LOG IN” button and log in with your Oculus or Facebook account. You need to be logged onto the same account on your PC and your Quest 2.

Once you do, this part of the page should then look like this:

3. Enter the main menu on your Quest 2. On your Quest 2 controller, press the Oculus button to open the main menu.

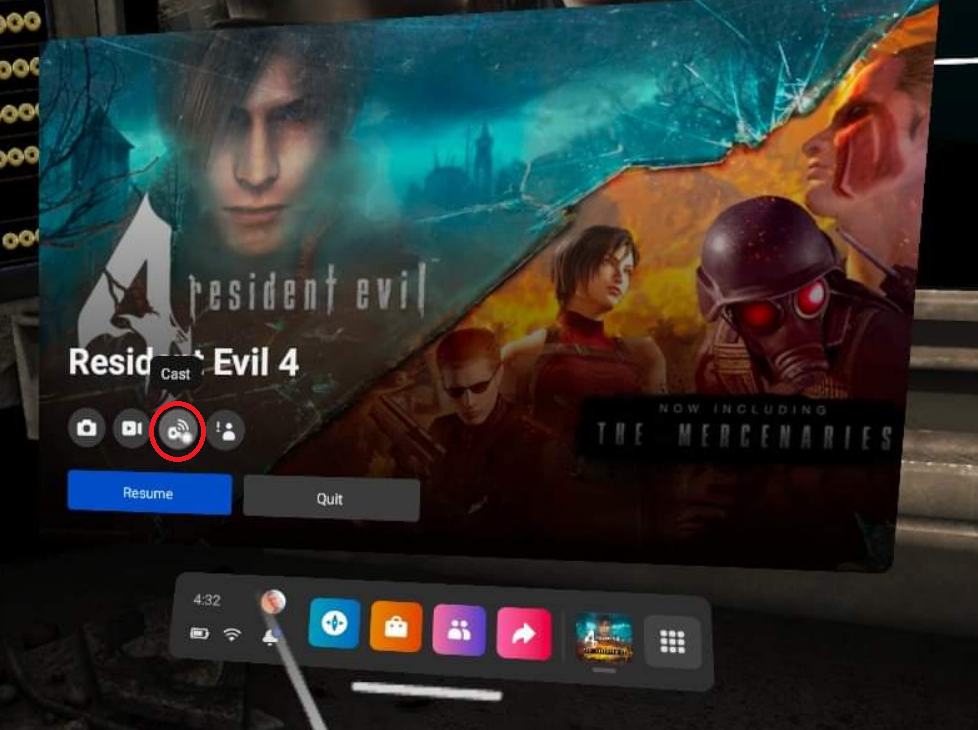
5. Enter the casting menu. There are two ways to do it.
Scenario A – Select the icon with the arrow pointing to the right (once you hover over it, it should say “Sharing” in case you are unsure if it is the right button).

Then, select “Cast” in the top right corner.

Scenario B: If you are running an app already, you can see the “Cast” button as you pause your game by pressing the same button as in Step 4.
6. Select “Computer” as your casting choice, and then “Next” as it lights up.
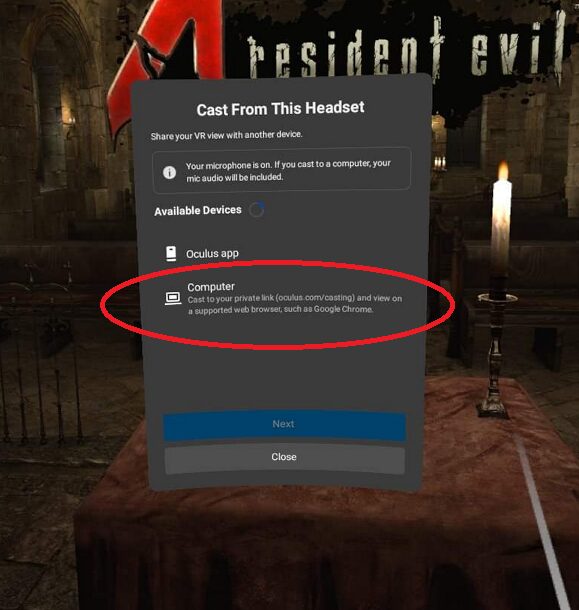
If you did everything correctly, you should see your Quest 2 broadcasted to your browser.
Step 3 – Share your screen to Discord
You can either share your whole monitor to Discord, but it is best to just share a single window so the people watching can hear the sounds.
How do you share your screen to discord?
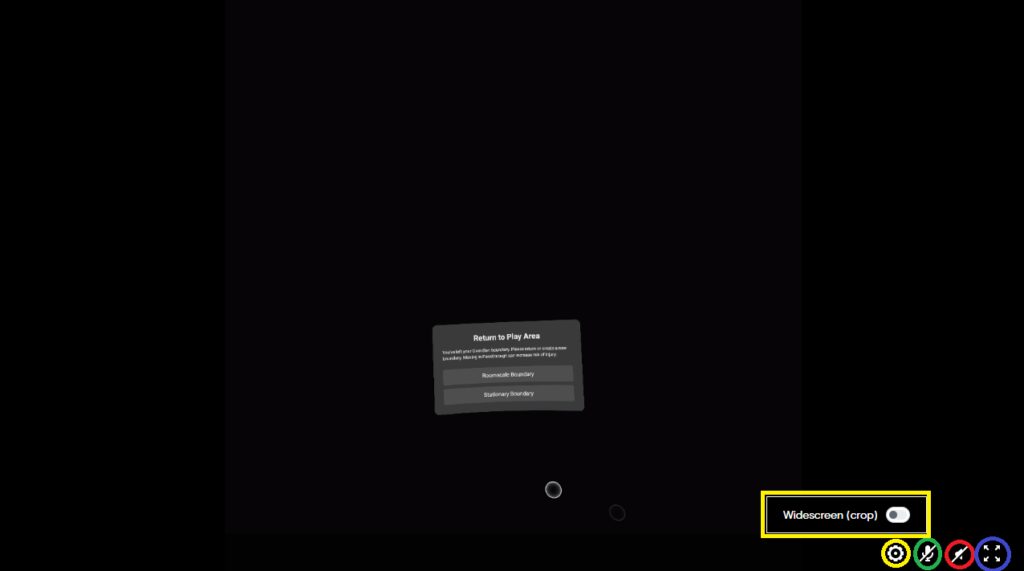
1. Make sure to make the casting full screen by pressing the four arrows (circled in blue).
- Optional settings:
If you wish to have sound from the game, make sure to unmute by clicking the speaker icon and then set the volume (circled in red). - Do not unmute the microphone from the Quest 2 (circled in green) as it will create an echo on Discord if you use a microphone from your PC to talk to other people.
- You can change the aspect ratio by clicking on the wheel icon (circled in yellow) and then checking the Wide Screen (crop) option.
2. Join a voice channel in discord that allows screen sharing (any voice channel is allowed by default unless it is set up differently by the server owner).

3. Click on the “Screen” button.

4. Select Oculus – Google Chrome (or Microsoft Edge, if you use it instead).

Step 4 – Optimize streaming settings
Select the settings you wish to use while streaming (some may be locked if you do not have Discord Nitro), and then press Go Live.

Congratulations! If you did everything correctly, everyone in your discord voice channel can now tune into the stream and enjoy the show!